DG_Slider – An Ultimate jQuery Content Slider Plugin

DG_Slider is a jQuery  plugin that carries you on a content slider or carousel ride filled with images and HTML content. Put simply, you can navigate images and/or HTML in a carousel-style widget. It is light weight, at about 14 KB in size, yet very flexible and customizable to fit most of our needs. DG_Slider is a great plug-in. It offers a host of features and it is so customizable that you are limited only by your imagination.

DG_Slider : A ultimate jquery content slider plugin with multiple options

Features

  • Horizontal, vertical, and fade transitions
  • Display and move multiple slides at once (carousel)
  • Prev / next, pager, auto controls
  • Start / Stop control
  • Easing transitions
  • Random start
  • Ticker mode also :)
  • Before, after, first, last, next, prev callback functions
  • Optional styling included
  • Tons of customizable options

For more information/Options visit : https://dhirajkumarsingh.wordpress.com/ultimate-jquery-content-slider-plugin-dg_slider/

Posted by: Dhiraj kumar

How to create a simple CSS3 loading animation

While playing DIRT 3, I’ve noticed a very cool triangle animation as part of their UI. Almost immediately, I thought about how to build a similar version of it using CSS3.

So, in this article you’ll see an experiment about how to create a simple CSS3 loading animation.

css3-loading-animation

For this example, I’ll be using two CSS3 animations: one that fades the color for the triangles and one animation that rotates the whole design. These two animations, synchronized, will help creating a quite nice effect.

The HTML

Initially, I wanted to use pseudo-elements in order to have less markup elements.

Here’s how the markup looks like:

<div class="loading-wrap">
  <div class="triangle1"></div>
  <div class="triangle2"></div>
  <div class="triangle3"></div>
</div>

The CSS

There are some things you may find interesting here:

  • For a nice color fade across all three triangles, you need to increment the animation-delay.
  • Notice the gap between 20% and 100% for the rotation key-frames. This helps adding a stop effect for the animation.
.loading-wrap {
  width: 60px; height: 60px;
  position: absolute;
  top: 50%; left: 50%;
  margin: -30px 0 0 -30px;
  background: #777;
  animation: rotation ease-in-out 2s infinite;
  border-radius: 30px;
}

.triangle1, .triangle2, .triangle3 {
  border-width: 0 20px 30px 20px;
  border-style: solid;
  border-color: transparent;
  border-bottom-color: #67cbf0;
  height: 0; width: 0;
  position: absolute;
  left: 10px; top: -10px;
  animation: fadecolor 2s 1s infinite;
}

.triangle2, .triangle3 {
  content: '';
  top: 20px; left: 30px;
  animation-delay: 1.1s;
}

.triangle3 {
  left: -10px;
  animation-delay: 1.2s;
}

@keyframes rotation {
    0% {transform: rotate(0deg);}
    20% {transform: rotate(360deg);}
    100% {transform: rotate(360deg);}
}

@keyframes fadecolor {
    0% {border-bottom-color: #eee;}
    100%{border-bottom-color: #67cbf0;}
}

view demo

Browser support

Try using modern browsers like:

  • Chrome,
  • Firefox (Gecko),
  • Opera 12+,
  • Internet Explorer 10 or
  • Safari 5+.

Conclusion

This is an experiment and you must be aware of it. For now, I think an animated GIF will do the job better in most of cases.

Also, this isn’t that example that advocates for using CSS3 stuff instead images to save HTTP requests. It is not applicable here as limited browser support for CSS3 animations has something to say. Though, I hope you’ll find this example useful and inspiring for your future projects.

Thanks for reading and I’m looking forward to read your opinions!

Posted by: Dhiraj kumar

HTML5 Logo Design Using CSS3

css3-html5-logoAs you probably found out, some time ago, the The World-Wide Web Consortium (W3C) has unveiled the HTML5 Logo. They launched more than a logo as they got also a full branding, including badges, t-shirts and stickers.

So, I suppose that’s a good thing, that HTML5 got some branding, sounds very interesting!

While looking at it and admiring it, as I find it very nice, I thought about how can I do it with CSS3 (typically for me).

What about the logo? It’s A Bird… It’s A Plane…

No, it’s the new HTML5 logo and in this article I’ll design it using only CSS!

HTML5-logo

Concept

Getting back to our work, I thought about the ingredients I’d need for this angular orange shield:

CSS borders shapes

I used borders in order to create the shield icon.

:before and :after pseudo-elements

Using this type of selectors it’s helpful when you want to achieve a minimal HTML markup.

CSS3 opacity and transform

Even if the article’s name says : “HTML5 Logo made with CSS3”, this isn’t mainly about CSS3, but, opacity and transform properties were very useful for this.

Custom font

The method I’ll use to display the 5 number is to include the Geo font via Google Font API.

I know it’s not identical, but, at the time I wrote this article, I found it quite similar. Instead, I’d appreciate if you could suggest me a better font to use for the number.

For a perfect result, I guess I could have used CSS3 skew transformation and a lot of empty divs to create the “5” number …

HTML5

<div id="wrapper">
    <span>5</span>

    <div class="inner"></div>
    <div class="inner left"></div>
    <div class="inner left cover"></div>    
</div>

CSS3

#wrapper {
        position: relative;
        width: 340px;
        margin: 10px auto 30px auto;
    }

    #wrapper span {
        font: normal 475px/305px 'Geo', serif;
        width: 340px;
        text-align: center;
        position: absolute;
        top: 0;
        z-index: 9999;
        color: white;
    }    

    #wrapper:before {
        content: '';
        display: block;
        /*340 total width */
        border-left: 30px solid transparent;
        border-right: 30px solid transparent;
        border-top: 345px solid #e34c26;
        width: 280px;
    }

    #wrapper:after {
        content: '';
        display: block;
        /*280 total width */        
        border-left: 140px solid transparent;
        border-right: 140px solid transparent;
        border-top: 40px solid #e34c26;
        width: 0;
        margin-left: 30px;
    }

    /**/

    .inner {
    position: absolute;
    top: 0;

    -moz-transform: scale(0.85);
    -webkit-transform: scale(0.85);
    -o-transform: scale(0.85);
    -ms-transform: scale(0.85);
    transform: scale(0.85);	
    }

    .inner:before {
        content: '';
        display: block;
        /*340 total width */
        border-left: 30px solid transparent;
        border-right: 30px solid transparent;
        border-top: 345px solid #f06529;
        width: 280px;
    }

    .inner:after {
        content: '';
        display: block;
        /*280 total width */        
        border-left: 140px solid transparent;
        border-right: 140px solid transparent;
        border-top: 40px solid #f06529;
        width: 0;
        margin-left: 30px;

        position: relative;
        top: -1px; /* Fix spacing */
    }

    /**/

    .inner.left {
        width: 170px; /* half from the 340px total width */
        overflow: hidden;
        -moz-transform: scale(1);
        -webkit-transform: scale(1);
        -o-transform: scale(1);
        -ms-transform: scale(1);		
        transform: scale(1);		
    }

    .inner.left:before {
        border-top-color: #e34c26;
    }

    .inner.left:after {
        border-top-color: #e34c26;
    }

    /**/

    .inner.left.cover {
        z-index: 10000;
        opacity: 0.1;
    }

Custom Font From Google Font API

<link href='http://fonts.googleapis.com/css?family=Geo' rel='stylesheet' type='text/css'>

My initial result:

HTML5-logo

I know it’s not perfect, especially the 5 number, but I hope you will still like it!

Updated result

I finally made it, I updated the initial HTML5 logo. Instead the custom font, empty divs were used in order to replicate the logo.

Now you have it! Minimal HTML markup, CSS3 transforms and pseudo-elements:-

HTML5

<div id="wrapper">        
    <div id="five">
        <div class="top"></div>
        <div class="left-top"></div>
        <div class="middle"></div>
        <div class="right"></div>
        <div class="bottom"></div>
        <div class="left-bottom"></div>      
    </div>

    <div class="inner"></div>
    <div class="inner left"></div>

    <div class="inner left cover"></div>    
</div>

CSS

h1 {
        font: bold 90px 'arial black';
        margin: 20px 0 0 0;
        text-align: center;
    }

    p {
        text-align: center;
    }

    /**/

    #wrapper {
        position: relative;
        width: 340px;
        margin: 10px auto 30px auto;
    }

    /**/

    #five {
        position: absolute; 
        z-index: 1;
        top: 0;
    }

    #five div,  #five div:after {
        position: absolute;
        background: #fff;
    }    

    #five .left-top {
        width: 40px;
        height: 130px;
        top: 72px;
        left: 70px;
        -webkit-transform: skew(5deg);
        -moz-transform: skew(5deg);
        -o-transform: skew(5deg);
		-ms-transform: skew(5deg);
		transform: skew(5deg);		
    }

    #five .top {
        width: 90px;
        height: 40px;        
        top: 72px;
        left: 80px;
    }

    #five .top:after {
        content: '';        
        left: 85px;
        top: 0;
        height: 40px;        
        width: 110px;
        -moz-transform: skew(-5deg);
        -webkit-transform: skew(-5deg);
        -o-transform: skew(-5deg);
		-ms-transform: skew(-5deg);		
		transform: skew(-5deg);
    }

    #five .middle {
        width: 96px;
        height: 40px;
        top: 162px;
        left: 75px;
    }

    #five .middle:after {    
        content: '';        
        top: 0;
        left: 96px;
        width: 80px;
        height: 40px;        
    }

    #five .right {
        left: 225px;
        top: 162px;
        height: 125px;        
        width: 40px;
        -moz-transform: skew(-5deg);
        -webkit-transform: skew(-5deg);
        -o-transform: skew(-5deg);
		-ms-transform: skew(-5deg);	
		transform: skew(-5deg);			
    }

    #five .bottom {	
        width: 90px;
        height: 40px;
        top: 260px;
        left: 87px;
        -webkit-transform: rotate(14deg);
        -moz-transform: rotate(14deg);
        -o-transform: rotate(14deg);  
		-ms-transform: rotate(14deg);		
		transform: rotate(14deg);		
    }

    #five .bottom:after {
        content: '';        
        left: 73px;
        top: -19px;
        height: 40px;        
        width: 94px;       
        -webkit-transform: rotate(-28deg);
        -moz-transform: rotate(-28deg);
        -o-transform: rotate(-28deg);
		-ms-transform: rotate(-28deg);	
		transform: rotate(-28deg);		
    }

    #five .left-bottom {	
        width: 40px;
        height: 65px;
        top: 222px;
        left: 80px;
        -webkit-transform: skew(5deg);
        -moz-transform: skew(5deg);
        -o-transform: skew(5deg);    
		-ms-transform: skew(5deg);	
		transform: skew(5deg);
    }

     /**/   

    #wrapper:before {
        content: '';
        display: block;
        /*340 total width */
        border-left: 30px solid transparent;
        border-right: 30px solid transparent;
        border-top: 345px solid #e34c26;
        width: 280px;
    }

    #wrapper:after {
        content: '';
        display: block;
        /*280 total width */        
        border-left: 140px solid transparent;
        border-right: 140px solid transparent;
        border-top: 40px solid #e34c26;
        width: 0;
        margin-left: 30px;
    }

    /**/

    .inner {
        position: absolute;
        top: 0;

        -moz-transform: scale(0.85);
        -webkit-transform: scale(0.85);
        -o-transform: scale(0.85);
		-ms-transform: scale(0.85);	
		transform: scale(0.85);		
    }

    .inner:before {
        content: '';
        display: block;
        /*340 total width */
        border-left: 30px solid transparent;
        border-right: 30px solid transparent;
        border-top: 345px solid #f06529;
        width: 280px;
    }

    .inner:after {
        content: '';
        display: block;
        /*280 total width */        
        border-left: 140px solid transparent;
        border-right: 140px solid transparent;
        border-top: 40px solid #f06529;
        width: 0;
        margin-left: 30px;

        position: relative;
        top: -1px; /* Fix spacing */
    }

    /**/

    .inner.left {
        width: 170px; /* half from the 340px total width */
        overflow: hidden;
        -moz-transform: scale(1);
        -webkit-transform: scale(1);
        -o-transform: scale(1);
		-ms-transform: scale(1);
		transform: scale(1);
    }

    .inner.left:before {
        border-top-color: #e34c26;
    }

    .inner.left:after {
        border-top-color: #e34c26;
    }

    /**/

    .inner.left.cover {
        z-index: 10000;
        opacity: 0.1;
    }

HTML5-logo

Browser support

Latest versions of:

  • Mozilla
  • Chrome
  • Safari
  • Opera
  • IE9

view demo


Posted by: Dhiraj kumar

HTML5 canvas awesomeness – games roundup

HTML5 is being developed as the next major revision of HTML, the core markup language of the World Wide Web. Besides new elements like headersectionfooter, etc., the HTML5 brings you the canvas element.

The canvas is a rectangular area within you can use Javascript to draw graphics or other visual images on a web page. Although HTML5 is not a W3C recommendation yet (because of cross browsers issues), people already started to play with it, and when I say play, I mean it.

Today I’ll share with you some awesome HTML5 games demos that show the HTML5 canvas potential.

Agent 008 Ball

8ball

Z-Type

RGB Invaders

Pacman

Spy Chase

Biolab Disaster

Wolfenstein 3D

Fred Jones in Adventureland

Asteroids

Crystal Galaxy

Same Game

Final words

A common misconception is that HTML 5 can provide animation within web pages, which is totallyuntrue. Either JavaScript or CSS3 (or both) is necessary for animating HTML elements.

Posted by: Dhiraj kumar

An Awesome CSS3 Animated Dropdown Menu

It’s a sure thing that CSS3 features like transitions, animations and transforms can add extra spice to your designs.

In this article you will see how you can build an awesome CSS3 animated dropdown menu with some of these cool features.  This is something I wished to do for a while and I finally made it. I just added support for smartphones / mobile devices and fixed the navigation for iPad and iPhone also.

css3-animated-dropdown-menu-preview

Here’s a quick preview for the CSS3 animated dropdown menu that we’re going to create today:

css3-menu-animation

The HTML

The HTML structure hasn’t changed at all, simple and minimal. Here’s an excerpt:

<ul id="menu">
        <li><a href="#">Home</a></li>
        <li>
                <a href="#">Categories</a>
                <ul>
                        <li><a href="#">CSS</a></li>
                        <li><a href="#">Graphic design</a></li>
                        <li><a href="#">Development tools</a></li>
                        <li><a href="#">Web design</a></li>
                </ul>
        </li>
        <li><a href="#">Work</a></li>
        <li><a href="#">About</a></li>
        <li><a href="#">Contact</a></li>
</ul>

The CSS

I revised and improved the styles in order to create this unique CSS3 animated dropdown menu. So, below you can find the commented pieces of styles:

Mini reset

Reset the default ul styles.

#menu, #menu ul {
        margin: 0;
        padding: 0;
        list-style: none;
}

Main level

The #menu is basically the main ul for this menu. CSS3 things like gradientsshadows and rounded corners help us to create the below:

css3-menu-wrapper

#menu {
        width: 960px;
        margin: 60px auto;
        border: 1px solid #222;
        background-color: #111;
        background-image: linear-gradient(#444, #111);
        border-radius: 6px;
        box-shadow: 0 1px 1px #777;
}

Clear floats

Here is Nicolas Gallagher‘s clearing method I’ve been using lately:

#menu:before,
#menu:after {
        content: "";

        display: table;
}

#menu:after {
        clear: both;
}

#menu {
        zoom:1;
}

List elements

css3-menu-elements

Please notice the #menu li:hover > a  selector. This is perhaps the most important CSS trick for this CSS3 dropdown menu.

So, this is how this works: Select an “a” element that is child of a “li” ; the “li” element must be a descendant of the “#menu”. Read more here.

#menu li {
        float: left;
        border-right: 1px solid #222;
        box-shadow: 1px 0 0 #444;
        position: relative;
}

#menu a {
        float: left;
        padding: 12px 30px;
        color: #999;
        text-transform: uppercase;
        font: bold 12px Arial, Helvetica;
        text-decoration: none;
        text-shadow: 0 1px 0 #000;
}

#menu li:hover > a {
        color: #fafafa;
}

*html #menu li a:hover { /* IE6 only */
        color: #fafafa;
}

Submenus

With CSS3 transitons we can animate changes to CSS properties like margin or opacity. This is very cool and I’ve used this for animating the CSS3 sub-menus. The result is great if you ask me:

css3-menu-animation

#menu ul {
        margin: 20px 0 0 0;
        _margin: 0; /*IE6 only*/
        opacity: 0;
        visibility: hidden;
        position: absolute;
        top: 38px;
        left: 0;
        z-index: 1;
        background: #444;
        background: linear-gradient(#444, #111);
        box-shadow: 0 -1px 0 rgba(255,255,255,.3);
        border-radius: 3px;
        transition: all .2s ease-in-out;
}

#menu li:hover > ul {
        opacity: 1;
        visibility: visible;
        margin: 0;
}

#menu ul ul {
        top: 0;
        left: 150px;
        margin: 0 0 0 20px;
        _margin: 0; /*IE6 only*/
        box-shadow: -1px 0 0 rgba(255,255,255,.3);
}

#menu ul li {
        float: none;
        display: block;
        border: 0;
        _line-height: 0; /*IE6 only*/
        box-shadow: 0 1px 0 #111, 0 2px 0 #666;
}

#menu ul li:last-child {
        box-shadow: none;
}

#menu ul a {
        padding: 10px;
        width: 130px;
        _height: 10px; /*IE6 only*/
        display: block;
        white-space: nowrap;
        float: none;
        text-transform: none;
}

#menu ul a:hover {
        background-color: #0186ba;
        background-image: linear-gradient(#04acec, #0186ba);
}

First and last list elements styles

css3-dropdown-first-last-items

#menu ul li:first-child > a {
        border-radius: 3px 3px 0 0;
}

#menu ul li:first-child > a:after {
        content: '';
        position: absolute;
        left: 40px;
        top: -6px;
        border-left: 6px solid transparent;
        border-right: 6px solid transparent;
        border-bottom: 6px solid #444;
}

#menu ul ul li:first-child a:after {
        left: -6px;
        top: 50%;
        margin-top: -6px;
        border-left: 0;
        border-bottom: 6px solid transparent;
        border-top: 6px solid transparent;
        border-right: 6px solid #3b3b3b;
}

#menu ul li:first-child a:hover:after {
        border-bottom-color: #04acec;
}

#menu ul ul li:first-child a:hover:after {
        border-right-color: #0299d3;
        border-bottom-color: transparent;
}

#menu ul li:last-child > a {
        border-radius: 0 0 3px 3px;
}

The jQuery

As you already get used to, IE6 gets some extra attention:

$(function() {
  if ($.browser.msie && $.browser.version.substr(0,1)<7)
  {
        $('li').has('ul').mouseover(function(){
                $(this).children('ul').css('visibility','visible');
                }).mouseout(function(){
                $(this).children('ul').css('visibility','hidden');
                })
  }
});

While the :hover pseudo-class does not work for other elements than anchor, we just need to add this small jQuery snippet to fix it. It’s pretty self-explanatory.

Update: Mobile navigation support

css3-mobile-dropdown

This is something I wished to do for a while and I finally made it. I just added support for mobile devices and fixed the navigation for iPad.

You know how much I love CSS only solutions, but this time we’ll be using some jQuery to enhance this menu. To view the result, you can narrow your browser window or browse it with your smartphone.

The viewport meta tag

To maintain everything at the correct scale, the first thing added is the viewport meta tag:

<meta name="viewport" content="width=device-width, initial-scale=1.0">

Small HTML update

You need to wrap the above HTML structure using something like: <nav id="menu-wrap">. This will be our relative holder for the mobile navigation.

The jQuery add

After page loads, we’ll add the #menu-trigger element which does exactly what you think: will trigger the mobile menu when it will be clicked. Further, in the CSS, you’ll see that this element is displayed using CSS3 media queries.

Another thing here is the iPad device detection. As you can see below, we’ll remove the fancy transition effect and stick to toggling display: none/block. This way, the functionality will be maintained also on the iPad.

/* Mobile */
$('#menu-wrap').prepend('<div id="menu-trigger">Menu</div>');
$("#menu-trigger").on("click", function(){
        $("#menu").slideToggle();
});

// iPad
var isiPad = navigator.userAgent.match(/iPad/i) != null;
if (isiPad) $('#menu ul').addClass('no-transition');

The mobile CSS

Here, the CSS3 media queries do the trick. We’ll add CSS rules to override the initial styles:

#menu-trigger { /* Hide it initially */
        display: none;
}

@media screen and (max-width: 600px) {

        #menu-wrap {
                position: relative;
        }

        #menu-wrap * {
                box-sizing: border-box;
        }

        #menu-trigger {
                display: block; /* Show it now */
                height: 40px;
                line-height: 40px;
                cursor: pointer;
                padding: 0 0 0 35px;
                border: 1px solid #222;
                color: #fafafa;
                font-weight: bold;
                background-color: #111;
                /* Multiple backgrounds here, the first is base64 encoded */
                background: url(data:image/png;base64,iVBOR...) no-repeat 10px center, linear-gradient(#444, #111);
                border-radius: 6px;
                box-shadow: 0 1px 1px #777, 0 1px 0 #666 inset;
        }

        #menu {
                margin: 0; padding: 10px;
                position: absolute;
                top: 40px;
                width: 100%;
                z-index: 1;
                display: none;
                box-shadow: none;
        }

        #menu:after {
                content: '';
                position: absolute;
                left: 25px;
                top: -8px;
                border-left: 8px solid transparent;
                border-right: 8px solid transparent;
                border-bottom: 8px solid #444;
        }       

        #menu ul {
                position: static;
                visibility: visible;
                opacity: 1;
                margin: 0;
                background: none;
                box-shadow: none;
        }

        #menu ul ul {
                margin: 0 0 0 20px !important;
                box-shadow: none;
        }

        #menu li {
                position: static;
                display: block;
                float: none;
                border: 0;
                margin: 5px;
                box-shadow: none;
        }

        #menu ul li{
                margin-left: 20px;
                box-shadow: none;
        }

        #menu a{
                display: block;
                float: none;
                padding: 0;
                color: #999;
        }

        #menu a:hover{
                color: #fafafa;
        }       

        #menu ul a{
                padding: 0;
                width: auto;
        }

        #menu ul a:hover{
                background: none;
        }

        #menu ul li:first-child a:after,
        #menu ul ul li:first-child a:after {
                border: 0;
        }               

}

@media screen and (min-width: 600px) {
        #menu {
                display: block !important;
        }
}       

/* iPad */
.no-transition {
        transition: none;
        opacity: 1;
        visibility: visible;
        display: none;
}

#menu li:hover > .no-transition {
        display: block;
}

view demo

Your turn

I hope you enjoyed this article and the techniques I used. Please share your comments and questions below!

Posted by: Dhiraj kumar

Google Font API and Typekit solutions VS CCS3 @font-face

A quick tutorial here about setting up your website with custom fonts using @font-face.  I am also sharing these alternative solutions, pros and cons.

The aim of this post is to briefly round up your options when using custom fonts in web design.

google-and-typekit-versus-font-face

CSS3 @font-face

The @font-face was first proposed for CSS2 and has been implemented in Internet Explorer since version 5.  However, their implementation relied on the proprietary Embedded Open Type (.eot) format, and no other browsers decided to use this format until Safari 3.1 was released.

Since then, web designers began to use .ttf or .otf fonts for their websites and now this CSS property is well-known.

css3-font-face

CSS

@font-face {
        font-family: '3DumbRegular';
        src: url('3Dumb-webfont.eot');
        src: local('?'), url('3Dumb-webfont.woff') format('woff'), url('3Dumb-webfont.ttf') format('truetype'), url('3Dumb-webfont.svg#webfont57ztNrX6') format('svg');
}

h1 {
  font-family: '3DumbRegular', Arial, sans-serif
}

Pros

  • A lot of available fonts you can choose from. Check this detailed list.
  • It works for all browsers.
  • It has no JavaScript dependency.

Cons

  • It takes slightly longer to implement than Google Font API (more code).
  • Quality of font rendering may differ browser to browser.
  • Your CSS may not be validated, depending on your DOCTYPE.

Google Font API

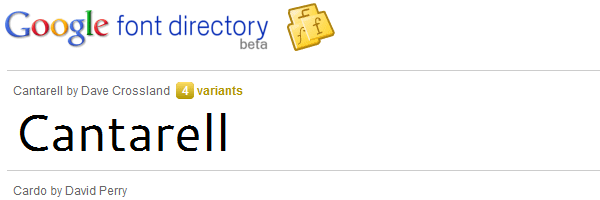
To use the fonts of Google’s font library, just go to http://code.google.com/webfonts and select a font. If you choose “Cantarell” font for example, include the following code into your files.

google-font-api

HTML

<link href="http://fonts.googleapis.com/css?family=Cantarell&subset=latin" rel="stylesheet" type="text/css">

CSS

h1 {
  font-family: 'Cantarell', arial, serif; /*Add also some font replacements, just in case...*/
}

Pros

  • Free solution from Google.
  • Quick set up.
  • No JavaScript dependency.
  • No need to think about font licensing.

Cons

  • Small number of fonts to choose from. (just for now, I hope)
  • Quality of font rendering may differ browser to browser.
  • No support for iPhone or iPad. Support added from iOS 4.2+ (iPhone, iPad, iPod).

Typekit

Typekit is a service launched by Small Batch, Inc. which, via JavaScript and a subscription service, allows webmasters and designers to embed non-standard, non-system-specific fonts into online documents. It uses the @font-face CSS property and is available to the public as a paid service.

typekit

HTML

<head>
        <script type="text/javascript" src="http://use.typekit.com/typekitid.js"></script>
        <script type="text/javascript">try{Typekit.load();}catch(e){}</script>
</head>

CSS

h1 {
        font-family: "museo-sans-1", "museo-sans-2", sans-serif;
}

Pros

  • Huge fonts library.
  • Good support articles and help section.
  • iPad, iPhone/iPod Touch support (experimental)
  • Control the behavior of your page as web fonts load (thanks @smcbride)

Cons

  • Typekit is a paid service but it also has a free version.
  • JavaScript dependency, and one extra HTTP request for you.

Other web fonts solutions

Conclusion(s)

Now that you found out all the pros and cons, it’s up to you to choose the method that best suits your needs.

Let me know in the comments the solution you like most!

Posted by: Dhiraj kumar

7 tips to organize your CSS

Working often with CSS for my own website or for my job makes me trying always to be organized and that made me thinking about a thing. What is the best way to organize my CSS file(s)? With this article I will try to present you a short guide about CSS organizing.

tips-to-organize-your-css

1. Group your CSS files into a folder

Beside your main CSS file you may want to use also a print CSS file or why not a CSS file for the IE6/7 browser. Placing them together in a folder named css for example will help you improve your website back-end structure.

group-css-files

2. Use efficient selectors

A very important thing for you to know is how browsers understand and read your CSS selectors? The answer is that they read them from right to left. That means that for the selector ul li a span the first thing thing interpreted is span.

efficient-selectors

The id is the selector with the greater specificity so always, instead div#header you should use just #header. This way your file will be less redundant and smaller. Also note that the use of efficient CSS selectors is a nowadays requirement.

3. Comment and separate your CSS rules

Generally, a CSS file contains reset styles, header, content and footer styles and in order to easier browse your CSS rules you should choose a way to separate them.

comment-css

You can choose an simple and easy to notice separator as in the following example:

  /* Header styles */
  /* ---------------------------------- */
  /* Content styles */
  /* ---------------------------------- */
  /* Footer styles */

4. Create a simple color scheme to use for your styles

When you are dealing for example with a CSS file for an web application you will use a lot common styles and colors.  So placing something as following inside a CSS comment could be very helpful for you:

  /* Colors: Light Gray #eaeaea, Dark Gray #828282, Red #c60000 */

5. Use a meaning naming convention for your selectors.

Let’s suppose you need to name your logo, menu and a tagline that are placed inside a header id wrapper. A good approach in this way would be to use namings as:

  • header-logo or h-logo
  • header-menu or h-menu
  • header-tag or h-tag

css-naming-convention

6. Create your own small CSS framework

By doing that you will be able to use these common CSS classes at any time for any elements from your markup.

.full-width{
  width: 100% !important;
}

.min-width{
  width: 1% !important;
  white-space: nowrap !important;
}

.centered-inline{
  text-align: center !important;
}

.centered-block{
  margin-left: auto !important;
  margin-right: auto !important;
}

7. Simple is better

Don’t try to complicate things because simplicity will save you time, effort and why not your remaining hair 🙂

Posted by: Dhiraj kumar

10 CSS shorthand tips and how to optimize CSS

cssIf you want to write efficient and optimized CSS code then you’ll surely need to have in mind the following shorthand tips.

These tips and tricks apparently don’t seem to be so important at the first sight. But once you write thousands of CSS lines you will wish to optimize every single line.

Why’s that? Because loading speed does matter (Google introduced this to their ranking algorithms) and your web pages will load faster because your stylesheet file size will be smaller.

Below I will present you a short, yet comprehensive CSS shorthand guide to help you get started optimizing your CSS file. So let’s have a look at some examples and see exactly how we can optimize a CSS file.

1. Background properties in one line

Defining a background property could be made in an easier way than we often happen to see.

Why using:

 background: url(example.gif);
 background-color: #eaeaea ;
 background-repeat: repeat-x;
 background-position: top left;

… when you could easier write:

background: #eaeaea url(example.gif) repeat-x top left;

2. Border property

When all of the border widths are the same, instead using:

border-color: red;
border-width: 1px;
border-style: solid;

… you can simply write this:

border: 1px solid red;

3. List properties

The following list properties:

list-style-position: outside;
list-style-image: none;
list-style-type: disc;

… could be simplified into:

list-style: disc outside;
/* shorthand notation for list properties */
/* list-style: [list-style-type] [list-style-position] [list-style-image];*/

4. Font and line-height properties

Font and line-height properties like the ones below:

font-family: Arial, Helvetica;
font-weight: bold;
font-style: italic;
font-size: 1em;
line-height: 1.5em;

… can be easily transformed into:

font: bold italic 1em/1.5em Arial, Helvetica;

Much simpler huh? 🙂

5. Margin and padding properties

This example applies for margin and also for padding, so next we’ll use as example the CSS margin property.

/* top=10px, right=5px, bottom=15px, left=20px */
margin: 10px 5px 15px 20px;

/* top=10px, right=5px, bottom=10px, left=5px*/
margin: 10px 5px;

/* top=10px, right=5px, bottom=15px, left=5px*/
margin: 10px 5px 15px;

Now let’s see what else we can do to write optimized CSS:

6. Always remember that “0″ anything equals to “0″

Use the “0″ value instead 0px or 0em so instead the the following CSS properties

margin: 0px;
padding: 0em;

you could use:

margin: 0;
padding: 0;

7. Use shortcuts for hexadecimal colors

White color equal to “#ffffff” or just “#fff”, #aabbcc can be wrote like #abc and so on.

8. Simplify non integer CSS values

Instead writing 0.5em you can use .5em, 0.5px is equal to .5px

9. The last property semicolon it’s not required?

div{
margin: 0;
padding: 0 /* note that you can skip the last rule semicolon, and yes it passes W3C validation */
}

10. Floated elements inherits “display:block” declaration

When floating an element there’s no need to add also “display: block” declaration as we often see. This is helpful for avoiding redundancy and save us one line of CSS.

These are some CSS shorthand tips I often use and they are very helpful for me, when coding CSS. I hope they will also help you writing shorter, better CSS code.

Over to you

What do you think about the tips I presented above and what else do you use for optimizing the CSS file?

Posted by: Dhiraj kumar

Things you should know about CSS anatomy

I often notice people tend to use stylesheets without knowing its structure meaning. That’s why, in this tutorial I will try to present you the CSS components structure.

css-structure-anatomy

1.Selectors

The selector is the element that is linked to a particular style.In the following example the selector is “p”, so “p” is the element who’s margin properties will be “0″.

p{
  margin: 0;
}

Class Selectors

The advantage of a class selector is that it can be applied to more than one elements according to W3C recommendation.

.colored{
  color: red;
}

Having this, all paragraphs who’ll have “colored” class as attribute will inherit red color from stylesheet.

ID Selectors

The id attribute assigns a unique identifier to an element, so try assigning an id attribute to no more than just one element.

If you’ll assign a CSS id to more elements within a page you will fail the W3C Markup Validationwhich is very important for you, as a designer.

#colored{
  color: red;
}

Contextual Selectors

p#colored span{
  color: blue;
}

This selector is applied to all “span” elements within the paragraph with “colored” id attribute.

Result:
blue-css-example

2.Properties

Now that we know how a selector looks like let’s see what is a CSS property. CSS properties defines how the styles should look on the Web page or elsewhere.

Examples: margin, padding, color, border, background etc.

In this example, the h1 element has three properties: color, font-family and margin. These properties with theirs values defines how the h1 element will look.

h1{
  color: red;
  font-family: Verdana;
  margin: 10px 0;
}

Conclusion

Using the selectors properly you will not only have a cleaner markup but you will also have a more beautiful CSS code.

Posted by: Dhiraj kumar

Reference: Useful HTML tags and their attributes

html
This tutorial is intented to introduce the HTML code basics to users that have never written a web site manually. Writing HTML code is pretty much writing tags, attributes and content. That’s why we’ll focus on how a tag and it’s attributes and contents are defined. Please Note that  In older versions of HTML, some tags did not require ending tags. With the emergence of XML and XHTML, you should be sure to include both beginning and ending tags.

Elements and tags

HTML is composed by a set of elements that are the basis of its structure. Elements are designed to give special information that will be used to compute their final representation. This means that where a tag is defined in the HTML code, something will happen in the representation of that document, that may be visual or not.

Body tag and attributes

<body>...</body> Contains the viewed portion of the document
<body bgcolor="color"> Sets the color of the background in hexadecimal code
<body background="filename.xxx"> Sets an image as a page’s background (wallpaper)
<body text="color"> Specifies the color of normal text in hexadecimal code
<body link="color"> Specifies the default color of unvisited links in hexadecimal code
<body alink="color"> Specifies the color of links on click in hexadecimal code
<body vlink="color"> Specifies the color of followed links in hexadecimal code

Font tag and attributes

<font>...</font> Changes font attributes for text within the tags
<font size="value">...</font> Sets the font to a size from 1 to 7, with 1 the smallest and 7 the largest
<font face="name">...</font> Sets the font face
<font color="color">...</font> Sets the font color using hexadecimal code

Image tag and attributes

<img> Embeds an image in the document at the location of the tag
<img src="url" alt="text"> Adds an image with a text description
<img src="url" alt="text" align="direction"> Aligns an image to the left, right, center, bottom, or top
<img src="url" alt="text" border="number"> Sets the size of the border around an image
<img src="url" alt="text" height="pixels"> Sets the height of an image
<img src="url" alt="text" width="pixels"> Sets the width of an image
<img src="url" alt="text" hspace="pixels"> Sets a horizontal margin to be placed around an image
<img src="url" alt="text" vspace="pixels"> Sets a vertical margin to be placed around an image
<img src="url" alt="text" usemap="map-name"> Designates an image as a client-side image map

Anchor tag and attributes

<a>...</a> Designates the origin and destination of a hyperlink
<a href="url">...</a> Creates a hyperlink
<a href="#name">...</a> Links to a target location in the current page
<a href="URL#name">...</a> Links to a target location in a page outside your site
<a name="name">...</a> Sets a target location within a document
<a href="mailto:email">...</a> Creates a mailto link
Optional attributes:
<a href="?" target="?">...</a> Specifies where the linked-to document is to be placed
<a href="?" rel="?">...</a> Sets up a relationship between the linked-to document and the current page
<a href="?" rev="?">...</a> Sets up a reverse relationship between the current page and the linked-to document

Table tags and attributes

<table>...</table> Generates a table
<table border="pixels"> Sets the size of cell borders
<table cellspacing="pixels"> Sets the amount of space between cells
<table cellpadding="pixels"> Sets the amount of space between a border and cell content
<table height="pixels" or "%"> Sets the height of a table
<table width="pixels" or "%"> Sets the width of a table
<td>...</td> Defines a table data cell
<td colspan="columns"> Sets a cell to span columns
<td rowspan="rows"> Sets a cell to span rows
<td nowrap> Prevents the lines within a cell from wrapping
<th>...</th> Defines a table header with bold, centered table data
<tr>...</tr> Defines a table row
<tr align="?"> or <td align="?"> Aligns the contents of a row or cell to the left, right, or center
<tr valign="?"> or <td valign="?"> Sets the vertical alignment of a row or cell to the top, middle, or bottom

Frame tags and attributes

<frameset>...</framesET> Specifies the layout of subsections in the main browser window
<frameset rows="value,value"> Defines the rows within a frameset
<frameset cols="value,value"> Defines the columns within a frameset
<noframes>...</noframes> Provides alternate content for browsers that do not support frames
<frame src="?"> Defines the appearance and content of a single frame
<frame name="name"> Labels the frame for targeting by other frames
<frame marginwidth="#"> Sets the margin width of a frame
<frame marginheight="#"> Sets the margin height of a frame
<frame scrolling="value"> Creates a frame scrollbar
<frame noresize> Prevents the resizing of a frame

Form tags and attributes

<form>...</form> Generates a container for all form elements
<form action="url"> Designates the path of the script to process input from the form
<form method="get|post"> Instructs the browser how to interact with the form URL
<form accept="media type"> Defines which MIME types are supported by the server processing the form
<form accept-charset="text"> Defines which character sets are supported by the server processing the form
<form enctype="media type"> Defines the format of the submitted data
<option> Defines each menu item
<select name="name">...</select> Generates a pull-down menu
<input type="checkbox"> Generates a check box
<input type="hidden"> Conceals a field from view
<input type="image"> Generates an image that acts like a Submit button
<input type="password"> Generates a one-line password box
<input type="radio"> Generates a radio button
<input type="text"> Generates a one-line text box
<input type="submit"> Generates a Submit button (send form)
<input type="reset"> Generates a Reset button (clear form)

Posted by: Dhiraj kumar